fbpx

Step 1

Inspect the heater for signs of damage or tampering. If signs of hazardous damage appear on the cord, or heater, please return the product to the retailer; do not use the product.

Step 2

Slip on rubber suction cups onto plastic ‘C’ shaped clips (if not already attached). Clip on the suction cup & clip onto the black painted section of the heater, above the ‘minimum clipping line’.

Step 3

Use the temperature adjustment knob to set your desired temperature (if you are unsure what temperature to set your heater at, please email us at help@advatecaquatics.com – we would be happy to help you). DO NOT over-spin the temperature adjustment knob in either direction (clockwise or counterclockwise). This may cause damage to the heater and void your Lifetime Warranty.

Step 4

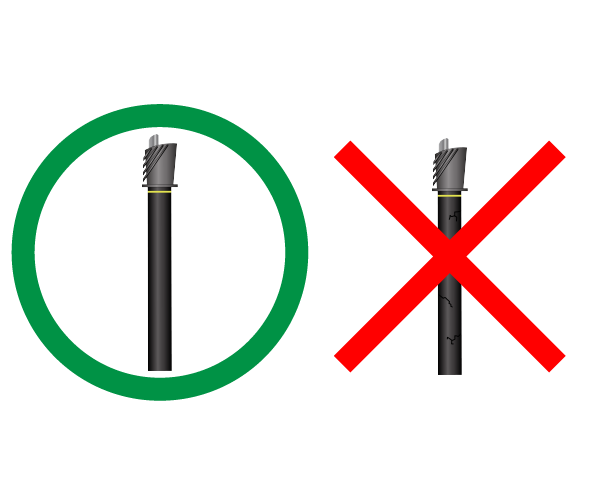
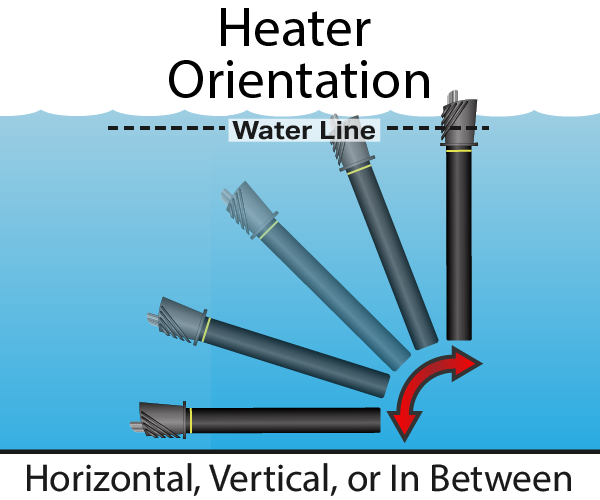
Place the heater into your aquarium, in an area that water will never go below the ‘minimum water line’. The heater must be oriented vertically, horizontally, or in between. Gently press the heater and suction cups onto a clean glass surface in the desired spot. Ensure that the aquarium water level is monitored on a daily basis to ensure the water level does not go below the ‘minimum water line’. Ensure that there is proper water circulation around the heater, so it performs optimally.

Step 5

When plugging heater into the electrical outlet, ensure a drip loop is present. Once the drip loop is created, ensure the heater has been submerged in the aquarium for at least 15 minutes before plugging the heater into the electrical outlet. After 15 minutes, you may plug the heater in.

Step 6

For the next 24 hours, it is best to monitor your aquarium’s temperature. DO NOT change the original desired temperature on the adjustment knob for the first 24 hours. Afterwards, use an accurate thermometer to confirm the temperature, and adjust accordingly.