fbpx

Step 1

Fist thing you want to do is fill up the test tube, that is provided in the kit, with water from your aquarium. Make sure you fill it up to the fill line. Do not go above or below the fill line.

Step 2

Once you have filled the test tube up with water from your aquarium. Grab 1 Test Strip out of the bottle, making sure you do not get the other test wet. Then put the whole Test Strip with the pads facing down into the test tube. After doing so close the cap and shake for 10 seconds.

*Note: Test Strip will bend down when cap is on.*

Step 3

Once you have shaken the test tube for 10 seconds let the bottle sit for 80 seconds. Then after 80 seconds remove the test strip from the test tube and discard the Test Strip properly.

Step 4

Once you have let the test tube sit for 80 seconds and removed the test strip from the test tube. You must compare the test water color to the color chart by looking through the top of the tube (without cap) within 5 seconds. You can compare it to the chart on the bottle or the card that is provided.

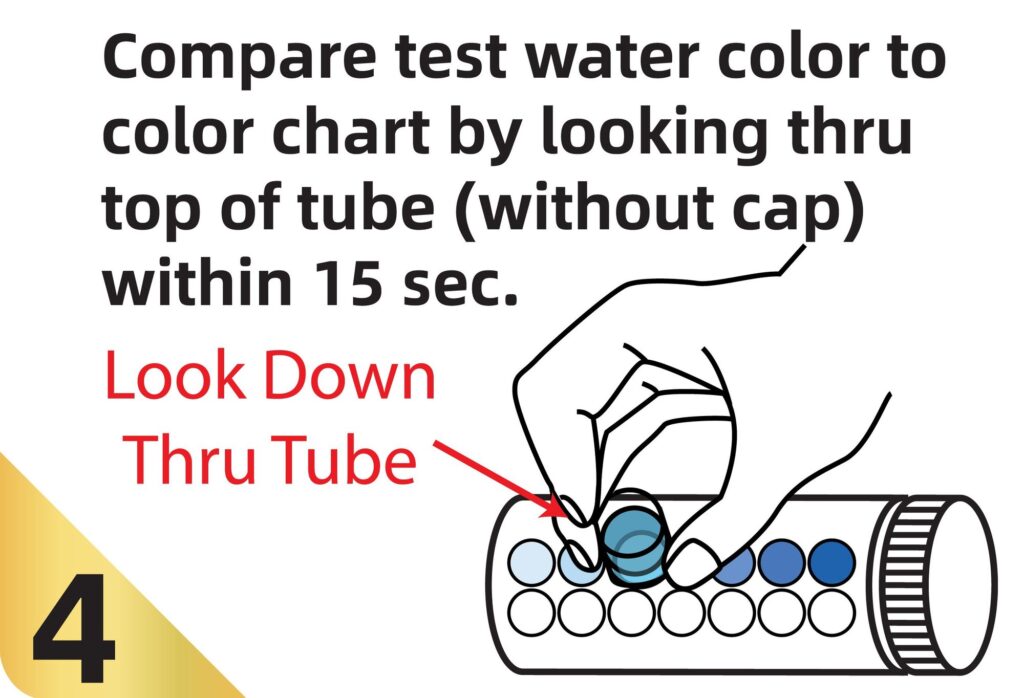
NOTE: Colors may bleed slightly on edges of pads while testing, this will NOT affect test results. Keep wet fingers out of bottle.

Our Aquarium Test Strips are designed to provide you with accurate lab grade results with a just a quick, easy dip!

Regularly testing your water helps ensure you are informed of any increased levels of harmful chemicals, allowing you to take proper actions before fish loss occurs.

RECOMMENDED TESTING: Aquariums 0-6 weeks old – Once every other day. Aquariums 6+ weeks old – Once every week. *Always test when an ailing or deceased fish is present*